Project Type:
MFA Student Work
Focus:
Machine Learning
Software Used:
Houdini
Date:
Fall 2025
Description:
A realtime muscle deformer I made for a research project delving into custom local machine learning and how it can be used for 3D applications.
Results
On the left side is an animaton done with an arm rig, and on the right is the displacement inferenced by the muscle deformation model I trained for this research project. This animation is comprised of “unseen” poses, meaning I did not use them to train the model. The response for the muscle deformation was at real-time speed.
Overview
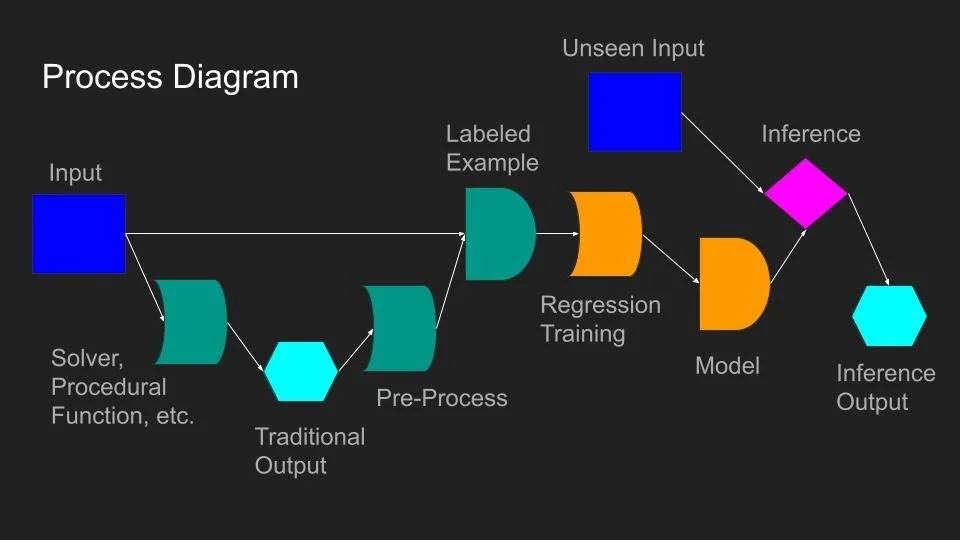
Training a usable model follows this system I outlined in my research presentation.
The general idea is to create a bunch of “labeled examples”, or pairs of inputs and their associated outputs on whatever procedure we are trying to build a model for.
Then these labeled examples are used as training materials for an algorithm that when run will produce the model. With this model we can guess at the output, or perform an ‘inference’, giving us a good approximation of what our procedure would output given the chosen input.
Inputs
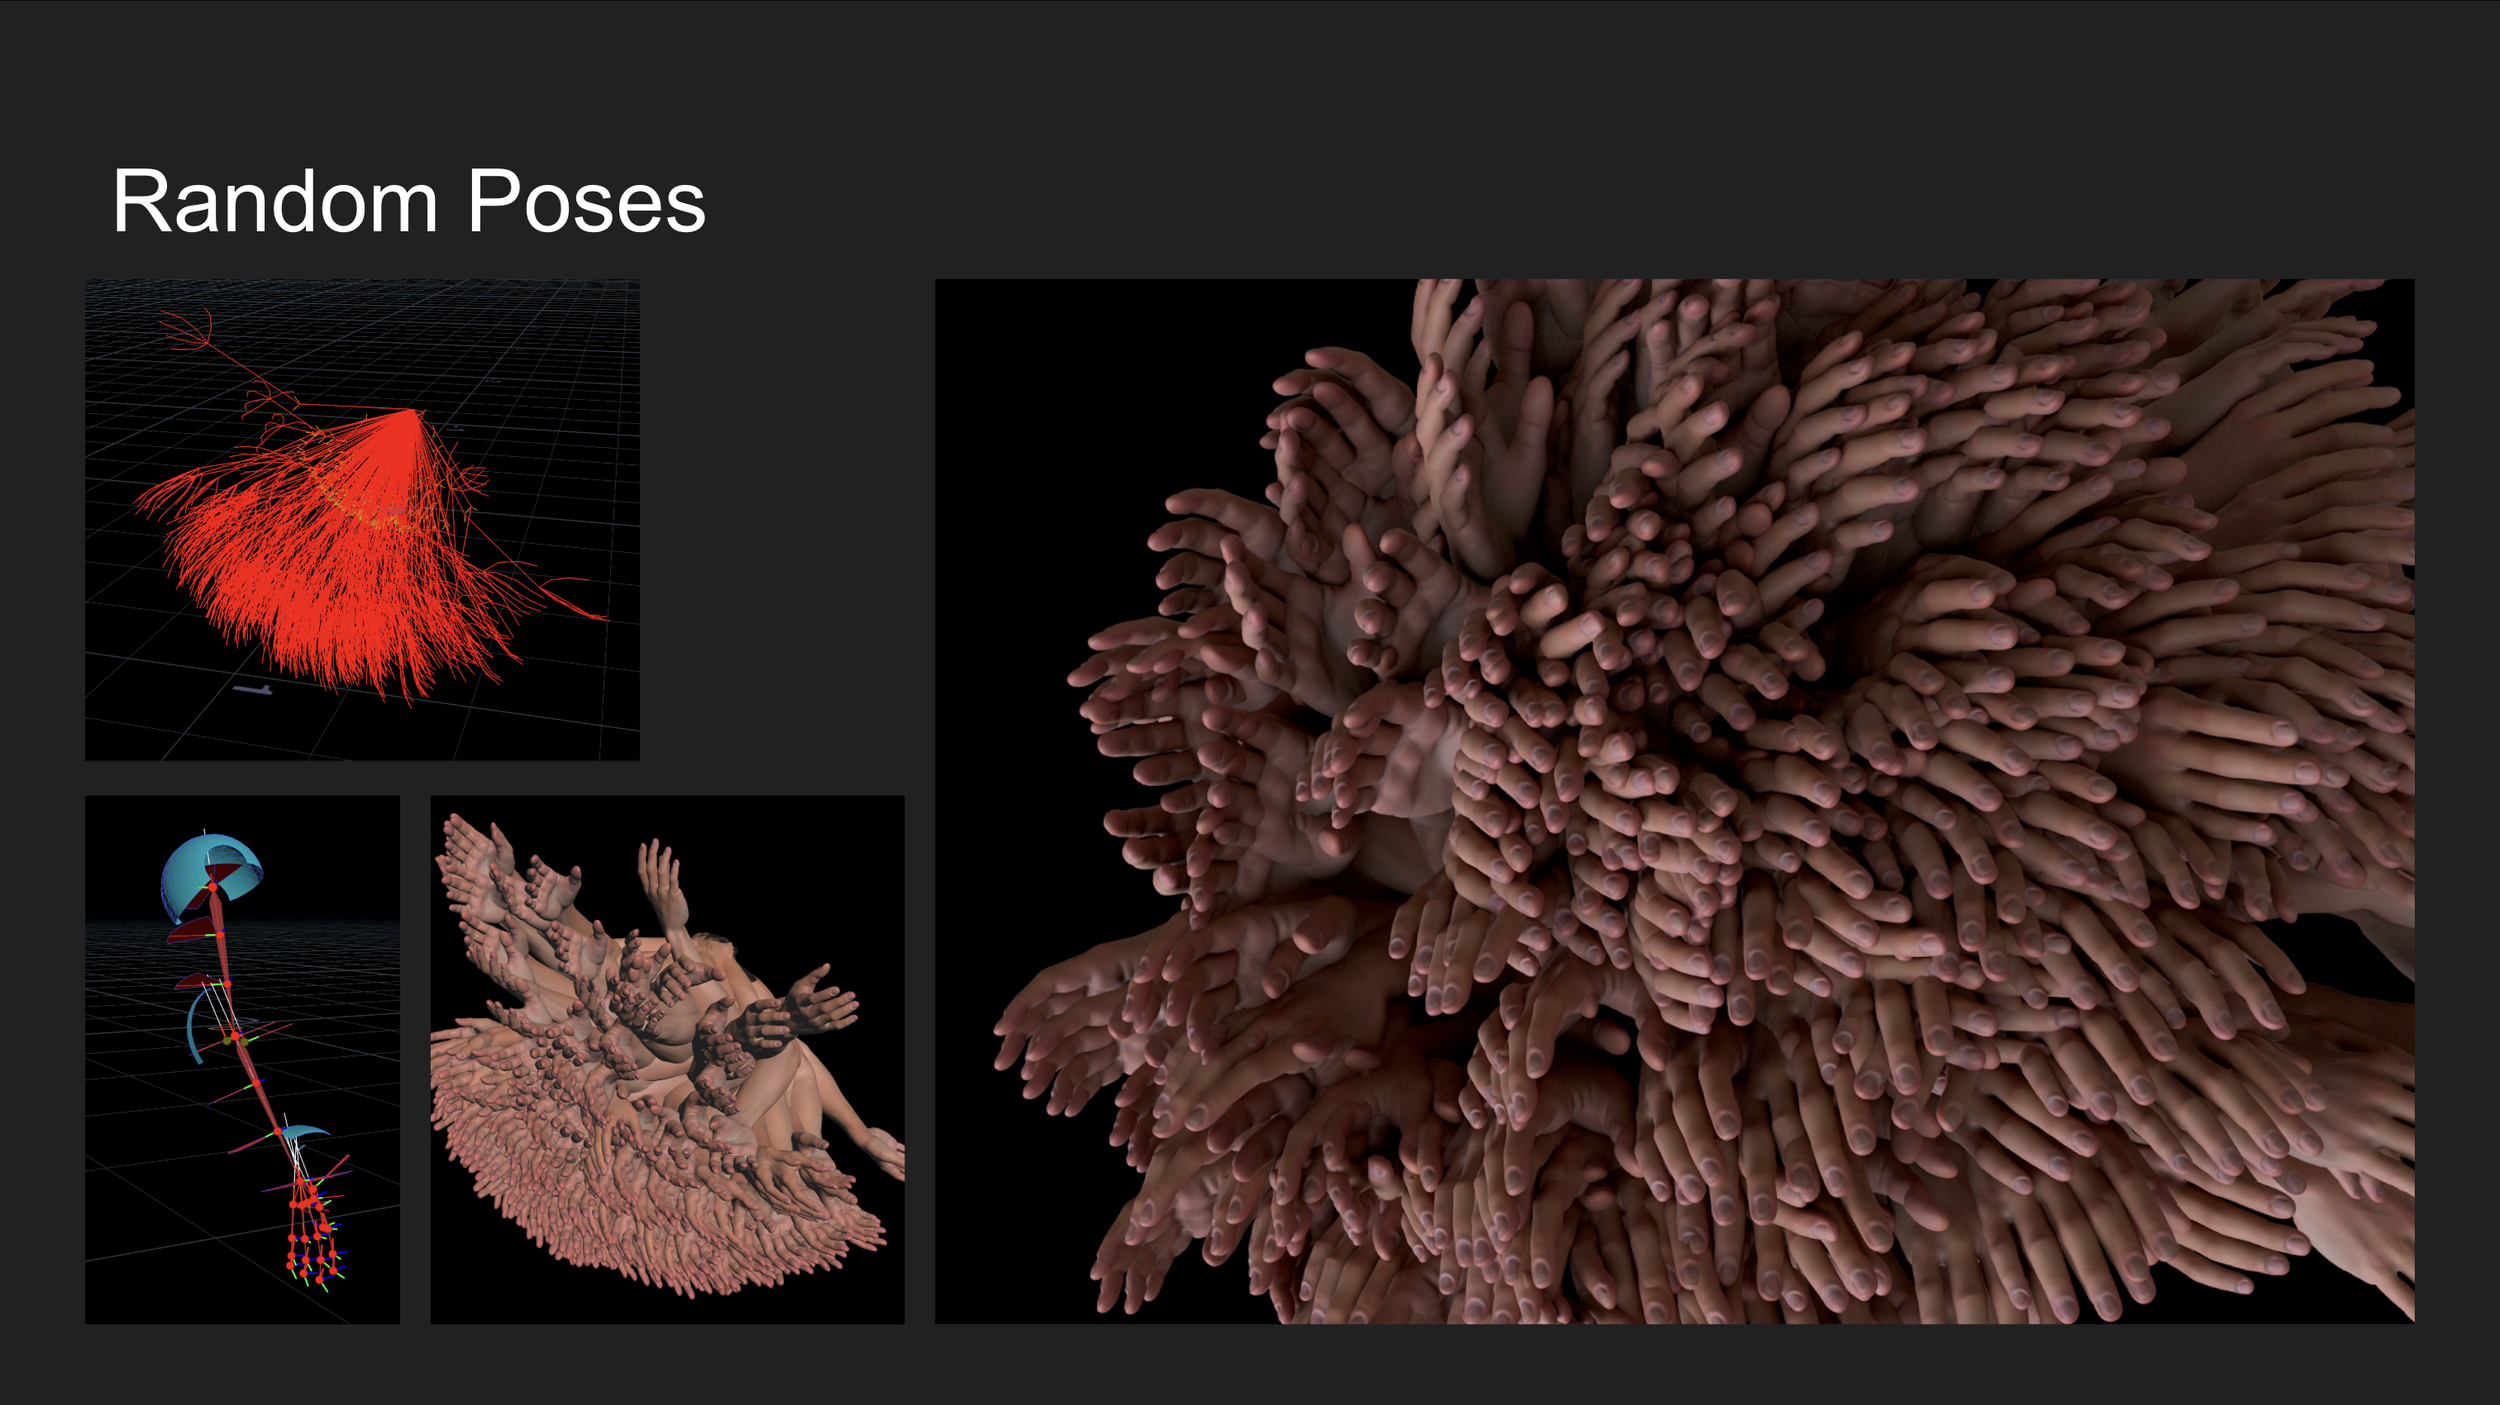
A good model requires a lots of examples to train on. I chose to build a demo using the Ottis muscle solver in Houdini, so for inputs I needed a bunch of different animations to perform the muscle solve on. To save time over hand animating a bunch of arm poses, I generated a set of random poses based on set bounds on how far each joint can move (preventing impossible poses).
Procedure (Muscle Simulations)
The random poses then were turned into short animations (motion clips) by tweening from the rest pose. This gave me a set of animations to then feed into the Ottis solver and generate simulated outputs. To clarify, the animation is just required for a succesful simulation, we only really want the final pose so the model can get an understanding of how the muscles look at that given position.
(Left: Muscle ; Center: Muscle and Fascia; Right: Final Skinned Output)
Automation
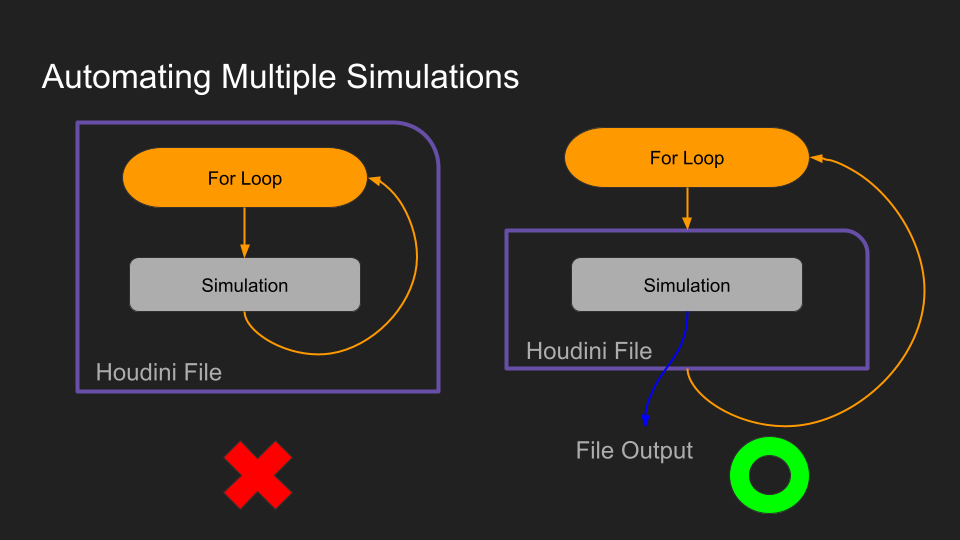
When performing all the simulations a problem arrises. The standard workflow in houdini does allow looping over functions, however if we loop over the simulation it can get pretty tricky/not-possible to manage the multiple inputs, simulations, and outputs this way. It is easier to instead step outside of our system and automate with something like Python or PDG. I chose PDG because all the premade regression tools live in PDG and it generally seems to be the reccomended way, but it is possible to automate systems like this with python.

Pre-Processing the Output
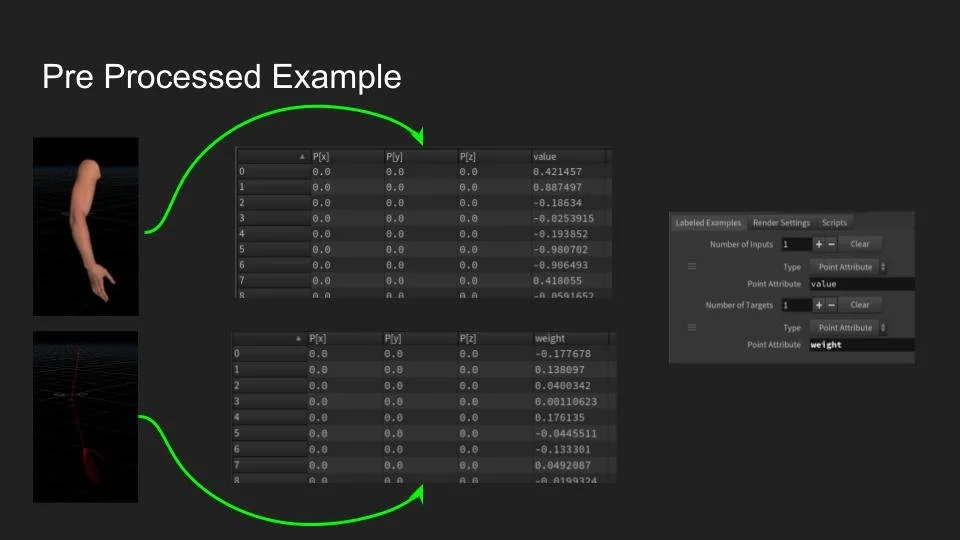
Before everything can get packaged up into the “Labeled Example” required for training, we need to simplify the data to help focus the model on what exactly it is trying to build associations for. In this case we want to highlight just the displacement incured but the muscle simulation. To do this we compare the unsimed and simed pose to see how much each point was displaced. Then we can strip away everything else and just have the points feature the displacement as their only attribute (shown on the right as their position in space).
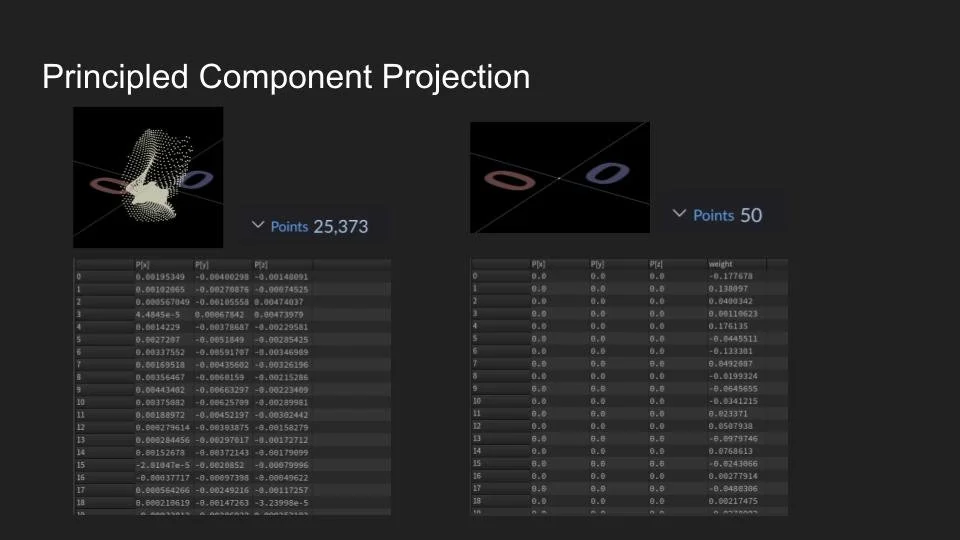
Principled Component Analysis
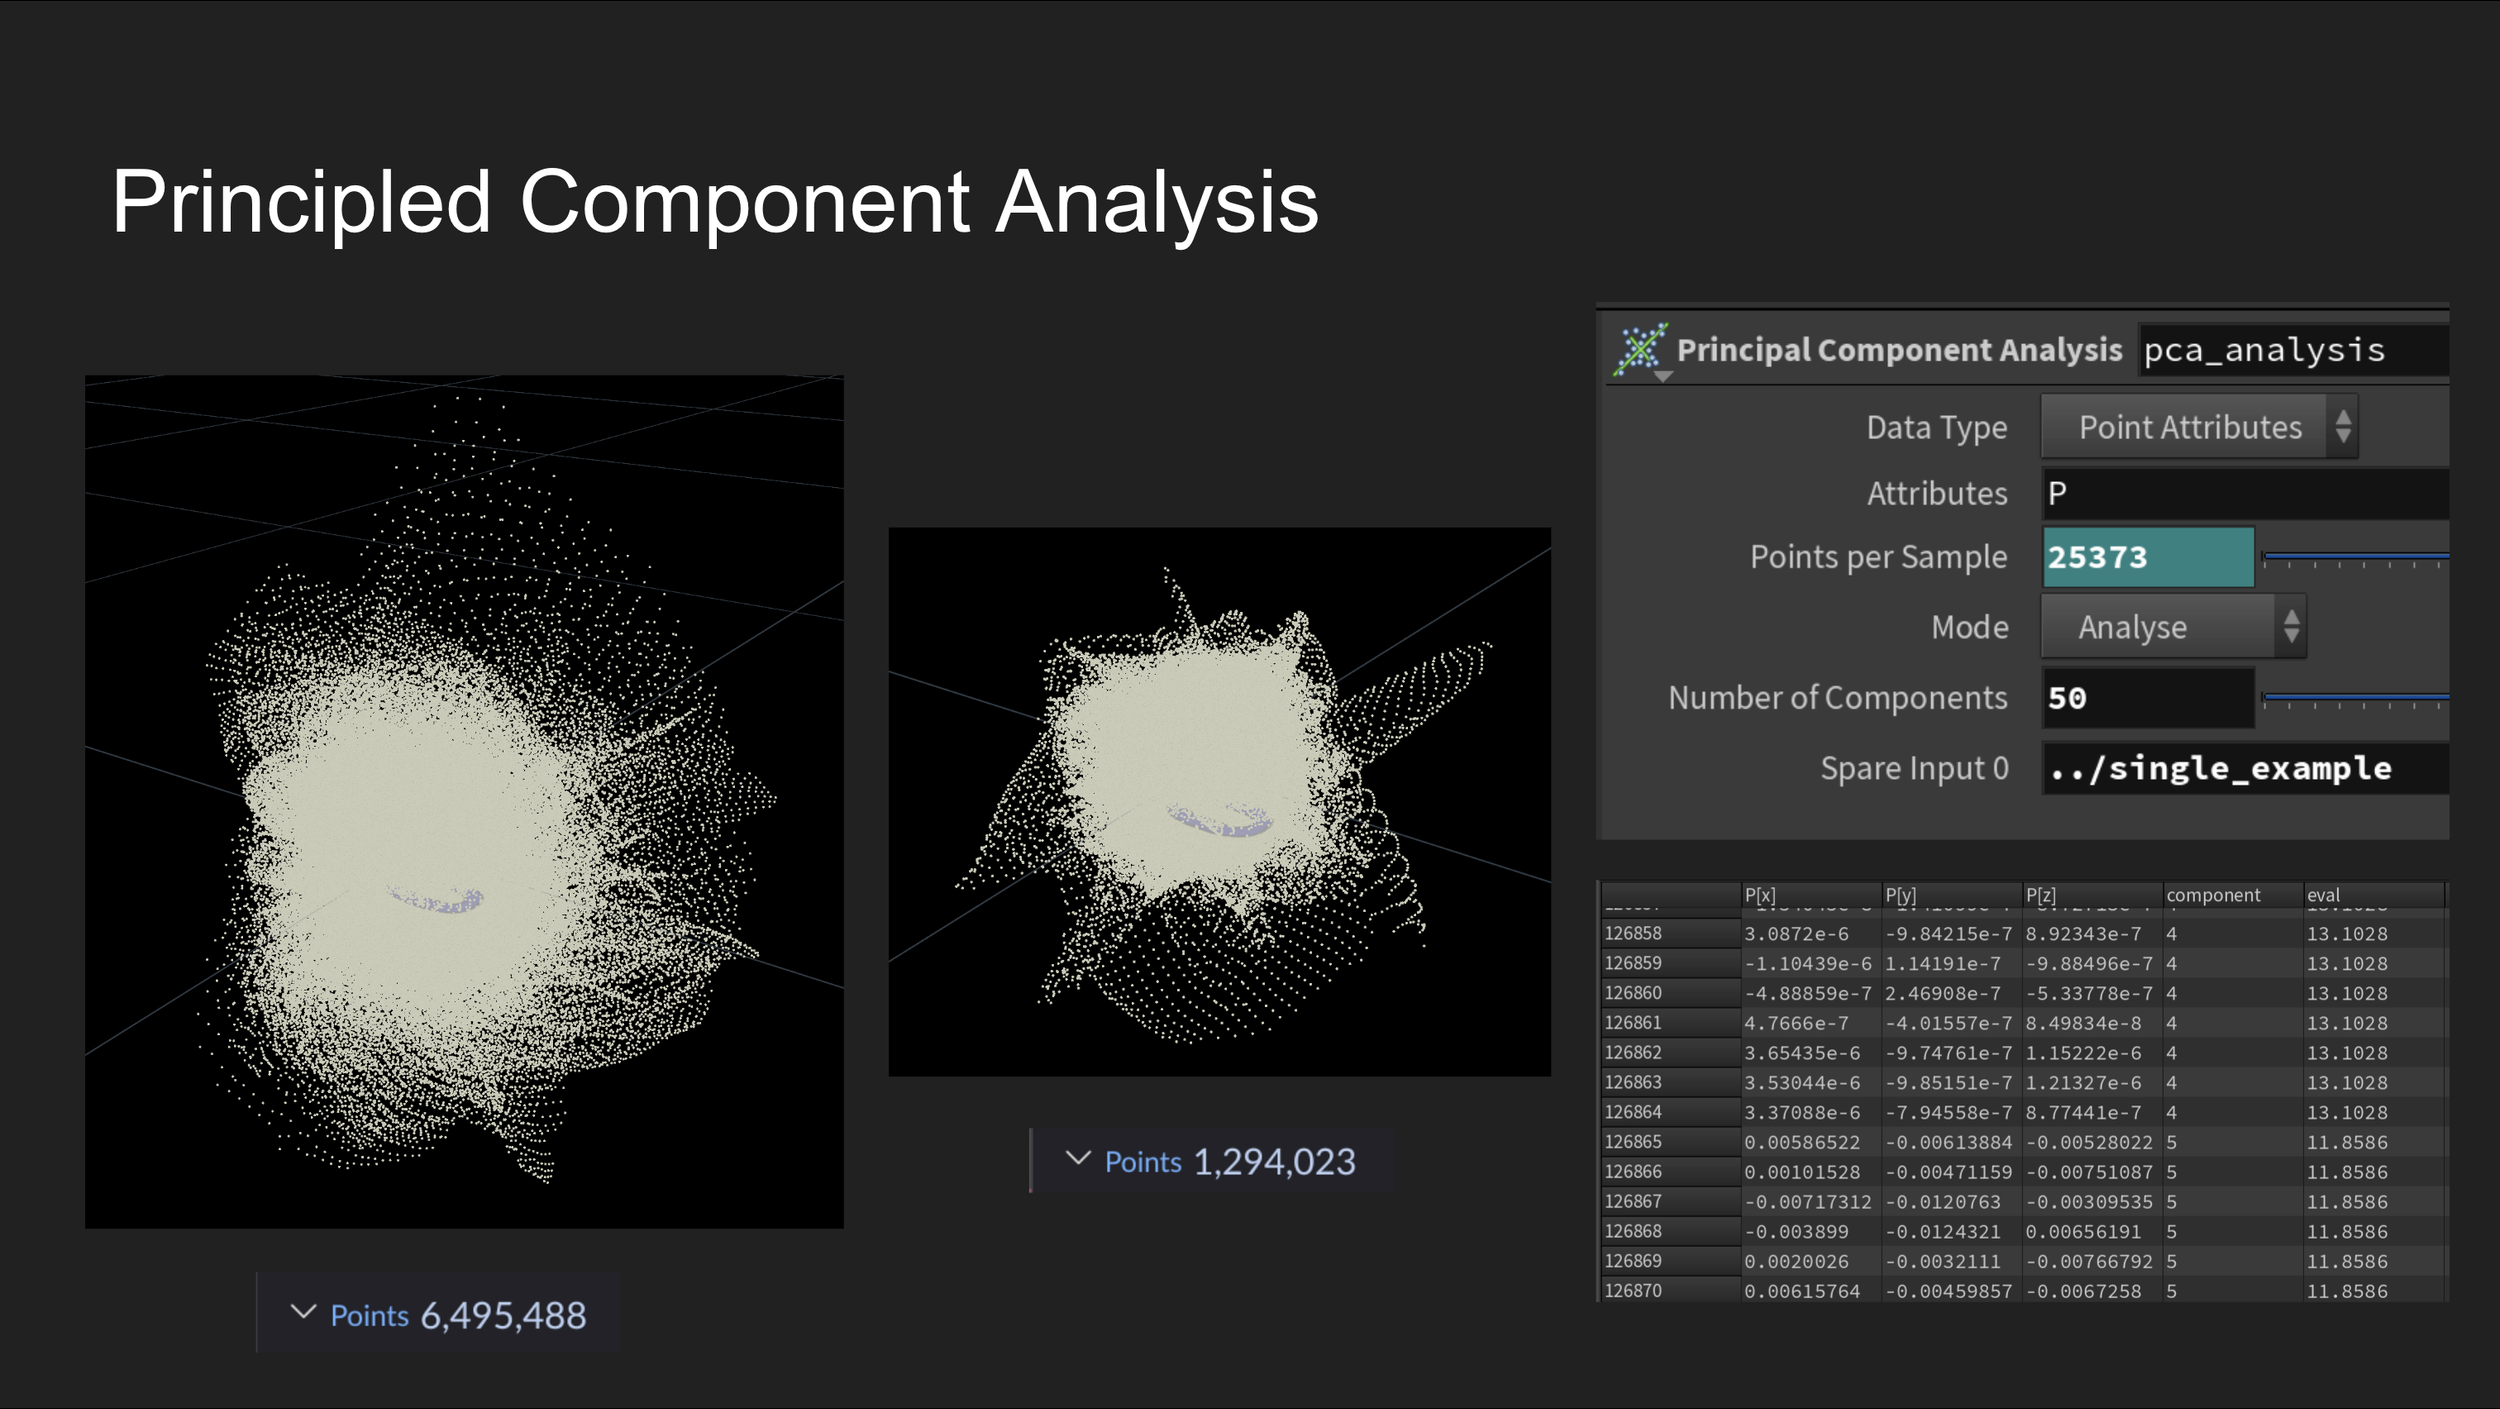
The next step is to compress this displacement vector into something even more simple and small. To do this we analyze all the displacements together using a process know as Principled Component Analysis. In this case this process gives us a bunch of directions by which to measure the points along.
Principled Component Projection
Then we take each pose and check it against the analysis, reducing the shape into a series of component - weight pairs. These can be added together like vectors based on the eigenvalue of the component (determined in the previous step) to reconstruct an approximation of the initial set of points.
Its all pretty complicated but the important takeaway is that we have reduced the 25,373 points of vector displacement information into 50 floats, all with the ability to return back to the initial pose we started with.
Labeled Example
Now we have succesfully converted the posed rig and simulated model into nice, small, and specifcic sets of float data we can pair them together into a “Labeled Example”. In this case the label is the pose data and the thing it is describing is the simulated geometry. We can send this off to pytorch for training the model, with the goal of building a good model for guessing those 50 weights based on whatever serialized pose we feed in.
Training
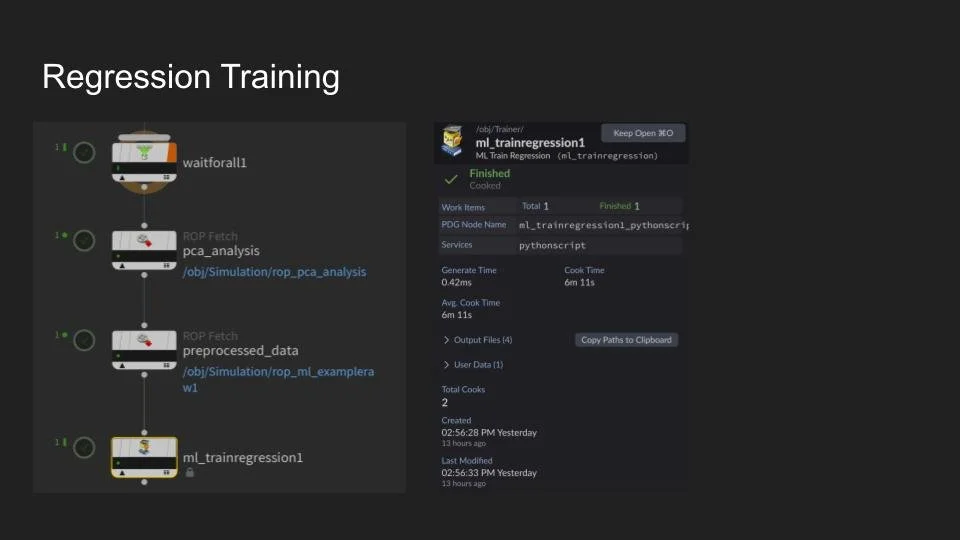
As much as I want to sing my praises and talk about the regression training like it was some kind of big undertaking, but it was actually incredibly straight forward, as Houdini features all the required pytorch scripts built into a few handy TOP nodes, so I just wired in my PDG set up into the regression train TOP and let it run. This demo was really simple with only 250 examples, so the model took only a few minutes to train, with the majority of the time spend simulating the muscles.
Sources:
The results were satisfactory, especially given the small data set. In the video on the righr
Also take a look at these references for more info on how this works and how to set it up: